Accessing Intelligent Agents
The Intelligent Agents tool is located in the Course Administration menu. Navigate to this menu by clicking the Edit Course link on the default course navigation bar. The Intelligent Agents tool is located in the Communication category.


The Intelligent Agents tool is an outreach effort an instructor can configure to send an automated email to a student when instructor-defined criterion are met. Instructors can create multiple agents that run on different schedules. Each time an agents runs, the system sends an email summary of activities performed to the instructor.
A Note about Creating Intelligent Agents
You can create, delete, and edit preexisting intelligent agents from the Agent List page. When creating an agent you must consider the following:
- What criteria must the student meet in order to trigger an email?
- What will the content of the email message include?
- How often should D2L “run” these agent checks?
Once you’ve answered these three questions, creating the intelligent agent will flow smoothly.
Create an Agent
Follow the workflow listed in the table below. Expanding each section should explain the settings needed to create a functioning agent.
-
Agent Details
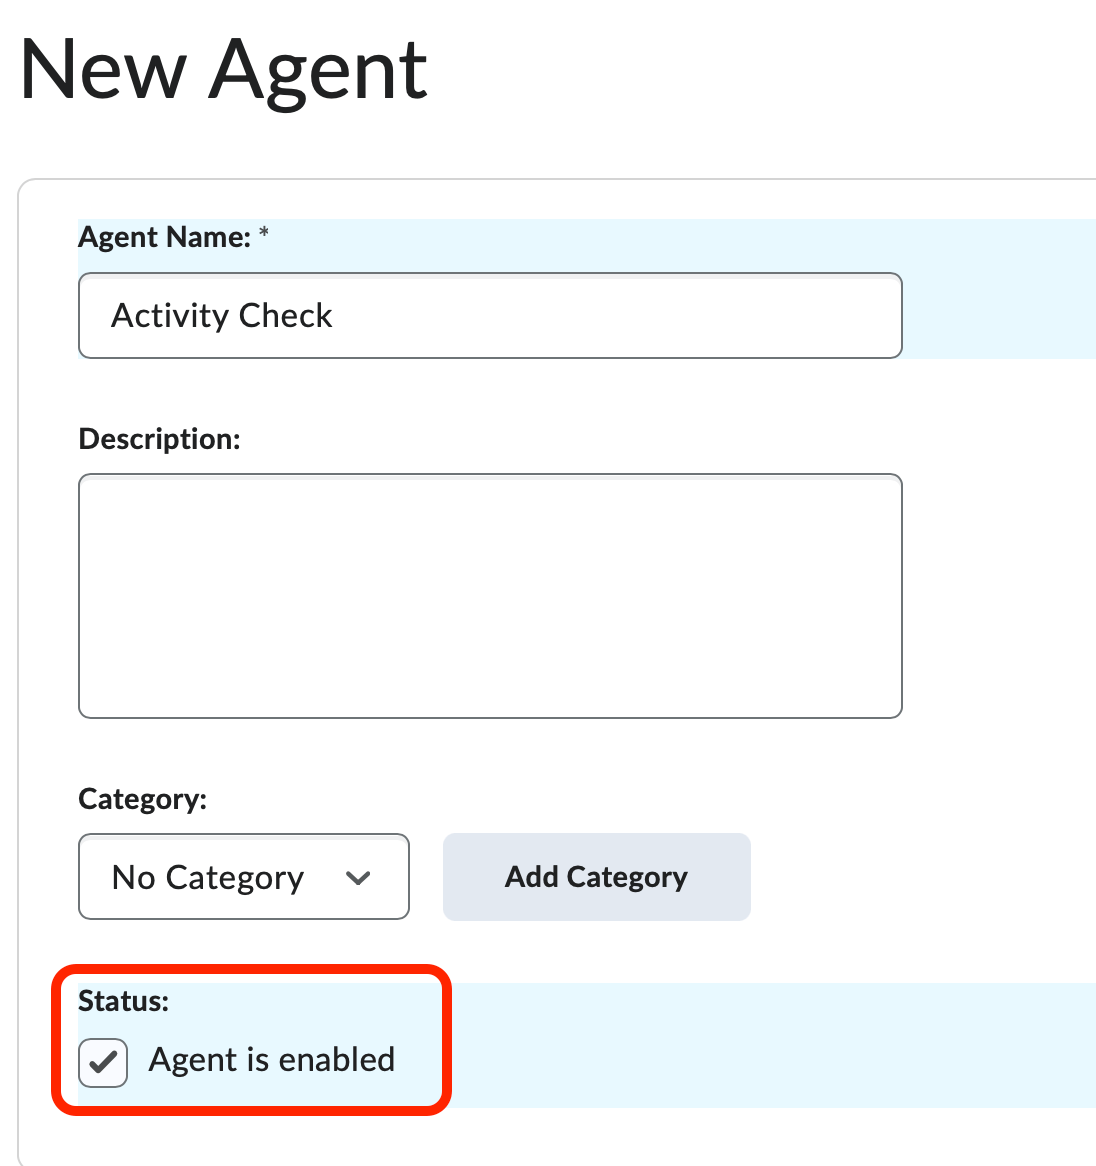
- From the Agent List page, click the New Agent button.
- Enter an agent name (required) and a description (optional).
- Select Agent is Enabled to activate the agent immediately after you create it. This setting is necessary
if you plan to schedule your agents.
-
Agent Scheduling
Choose the frequency of your agent from the dropdown menu under Scheduling.
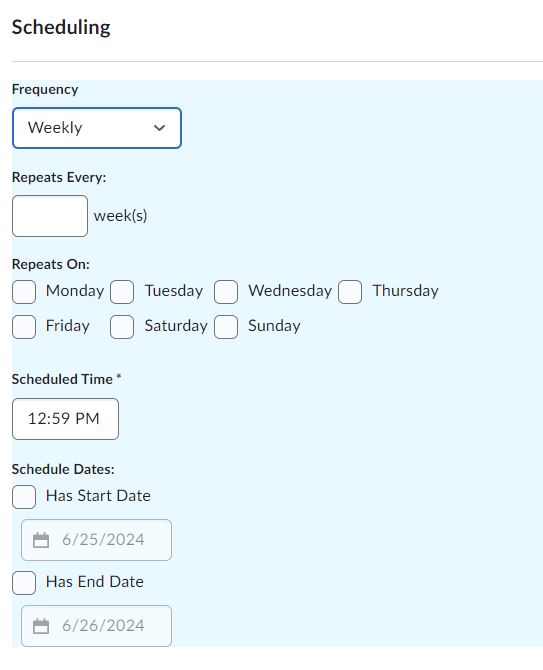
Once you have selected the frequency, you can set how often it repeats, date and time preference, and start and end dates.
-
Agent Criteria: Login Activity, Course Activity,& Release Conditions
Establish the criteria the agent will use:

- Check the box beside Login Activity under Take Action on Activity if you want the agent to notify you/send an email to a student who has not accessed D2L recently.
- Check the box beside Course Activity under Take Action on Activity if you want the agent to notify you/send an email to a student who has not accessed
your course recently.
- Select the User has not accessed the course at least __ days radio button and enter the number of days in the associate text box.
- If you prefer the agent send an email once a student performs a particular action within the course you must create and attach a release condition. Click the Create button to create a release condition.

-
Agent Actions
- Choose one of the two options in the Action Repetition section to determine if you prefer the agent to run repeatedly.
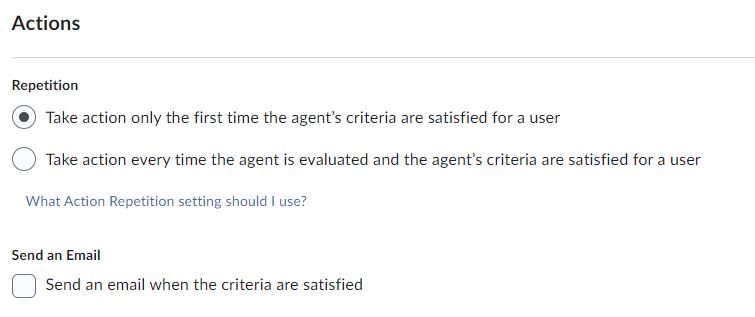
- Take action only the first time the agent's criteria are satisfied for a user will allow the agent to run only once.
- Take action every time the agent is evaluated and the agent's criteria are satisfied
for a user will allow the agent to run any time the conditions are met.
- Check the Send an Email box to send an email to students when they meet the agent criteria. You MUST check this box to send an email.
- Choose one of the two options in the Action Repetition section to determine if you prefer the agent to run repeatedly.
-
Constructing the Email
- Use the {InitiatingUser} replacement string in the TO/CC/BCC field.
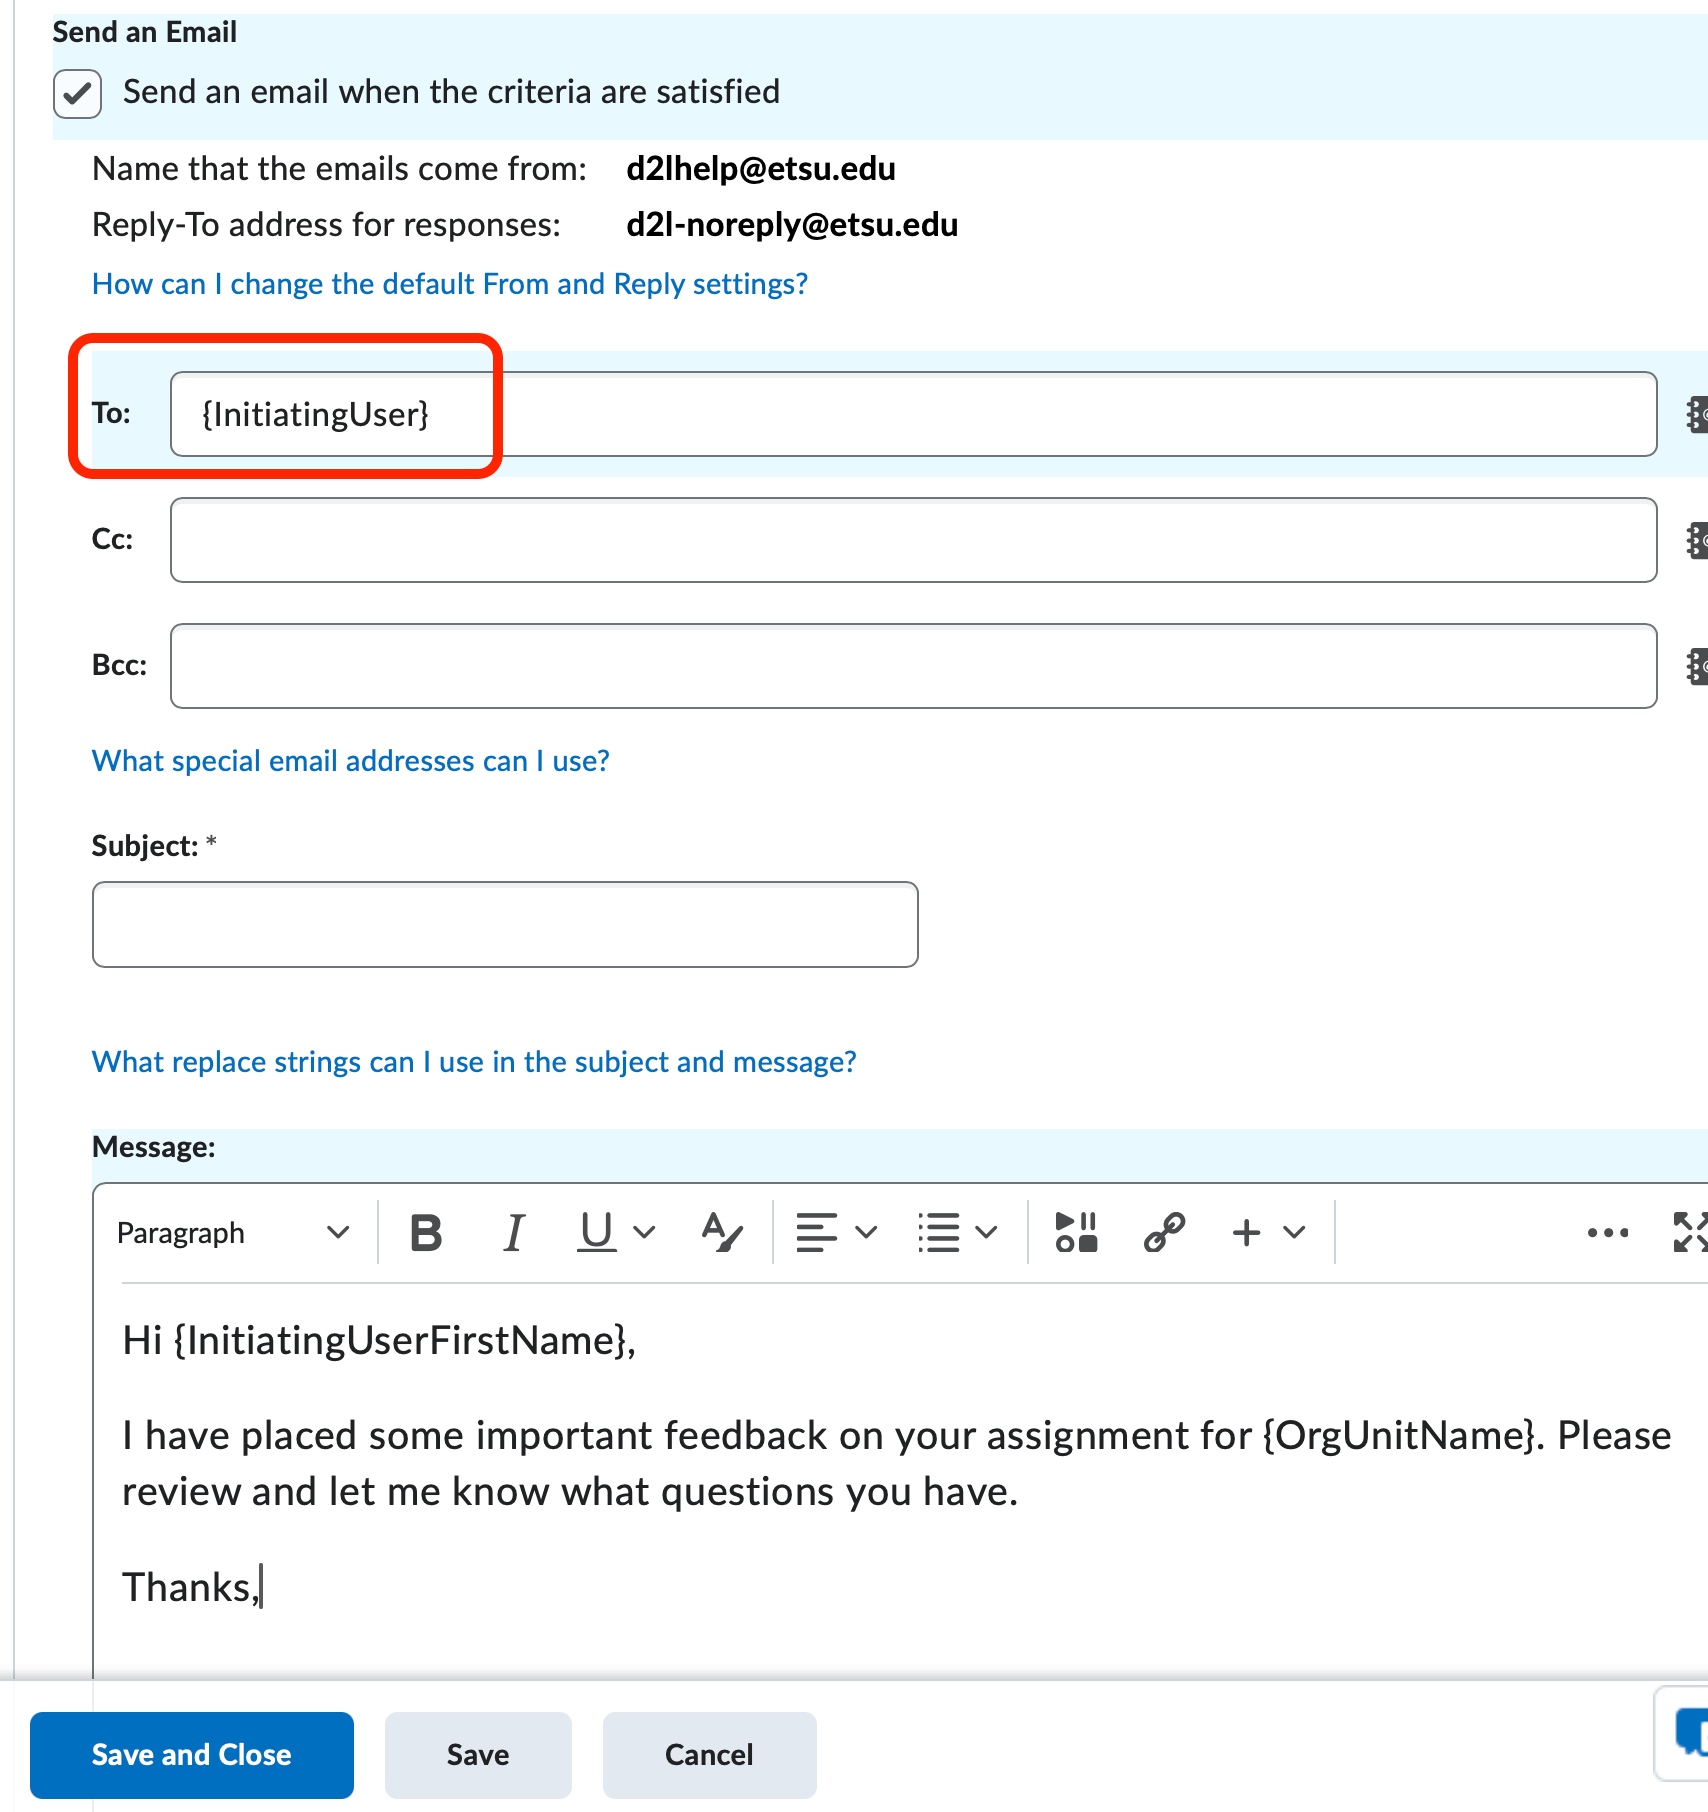
- Enter a subject line – a replacement string can be used here.
- Compose your email body in the Message field. – a replacement string can be used here, too.
- Click Save and Close
- Use the {InitiatingUser} replacement string in the TO/CC/BCC field.
Replacement Strings
Replacement strings are lines of code that you can enter in automated emails that retrieve user and course-specific information. For example, using a replacement string in place of the TO: field of an email triggers D2L to automatically replace that code with the email address of the student who has met the specific agent criteria. Refer to the table below for a list of replacement strings you can use in the subject line and body of an email message.
| Replacement String | Resulting Information |
| {OrgUnitCode} | your class number (e.g., ENG_000_101_0920) |
| {OrgUnitName} | the name of your class |
| {InitiatingUserFirstName} | the student’s first name |
| {InitiatingUserLastName} | the student’s last name |
| {InitiatingUserUserName} | ETSU username |
| {InitiatingUserOrgDefinedId} | the student’s E-number |
| {LoginPath} | the web address for D2L |
Running an Agent Manually
If you did not set up a schedule for your intelligent agent, follow these steps to run the agent manually
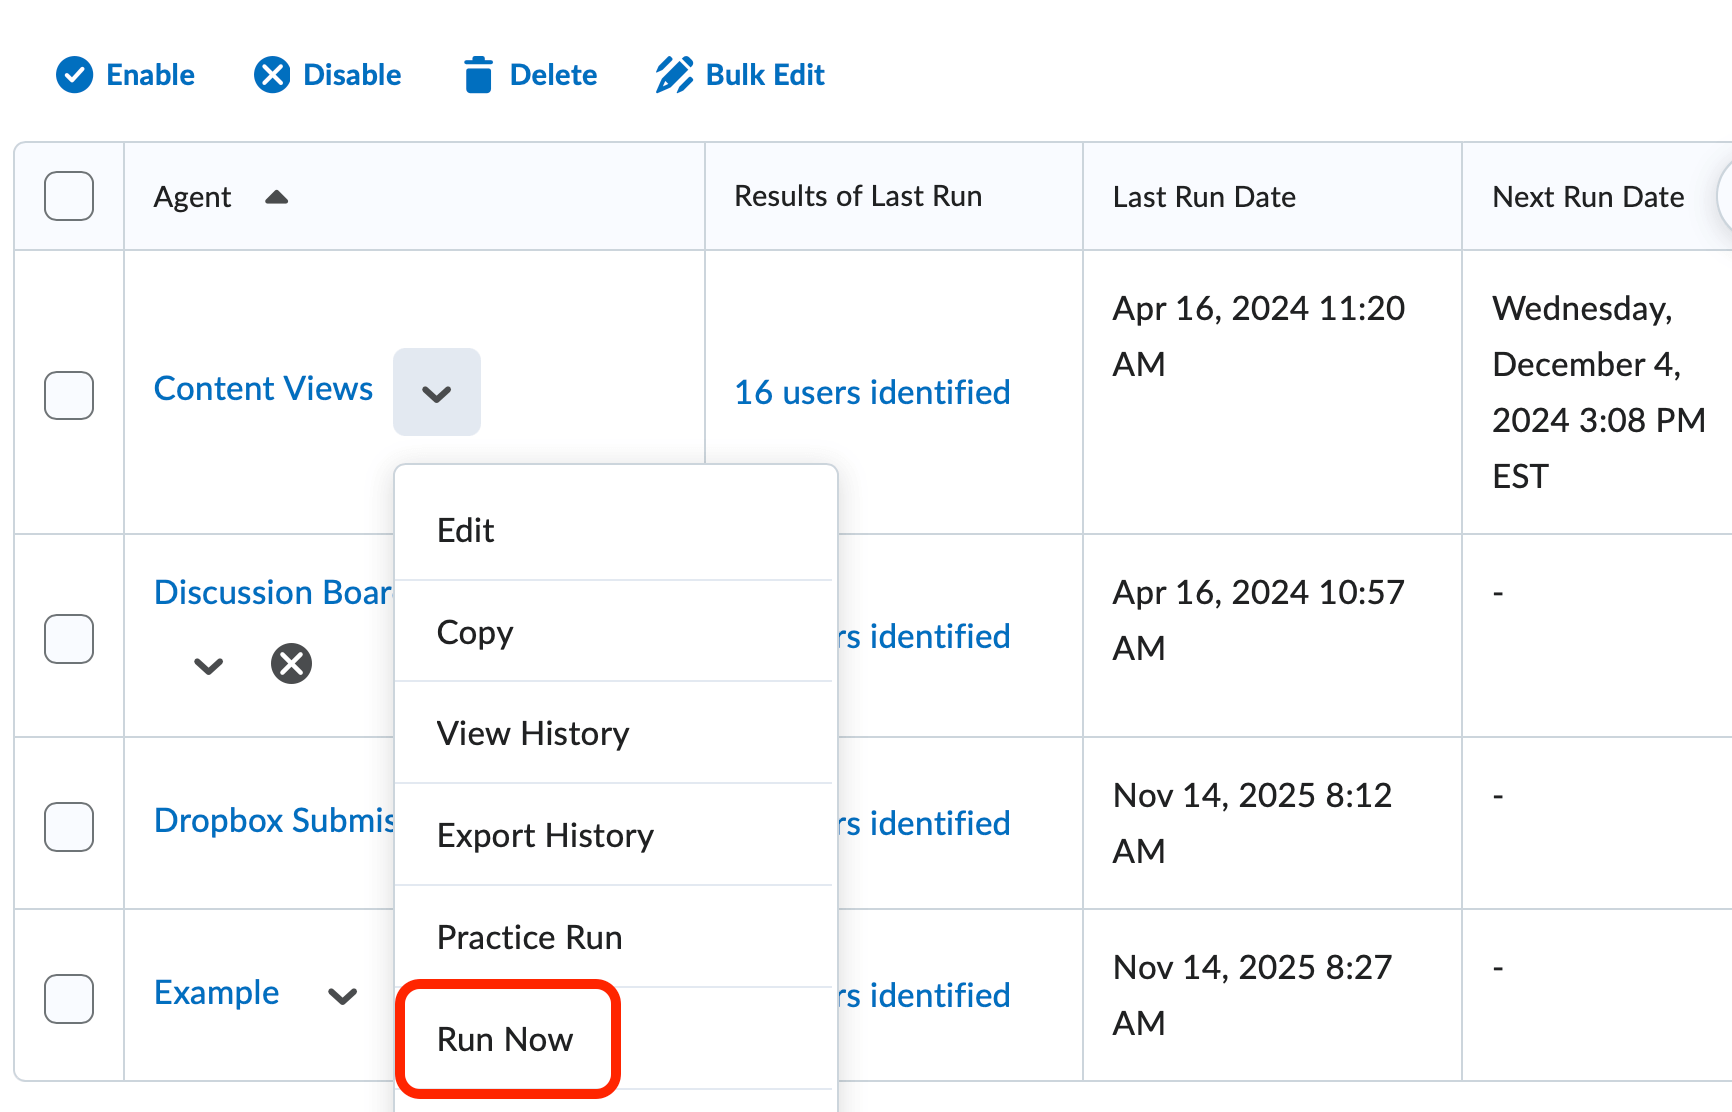
- From the Agent List page, click the drop-down arrow next to the agent you wish to run.
- Select Run Now from the menu.
- Click Run once the confirmation box appears.